Follow these instructions to customize the reading levels... (An In-App Purchase is required to use this feature)
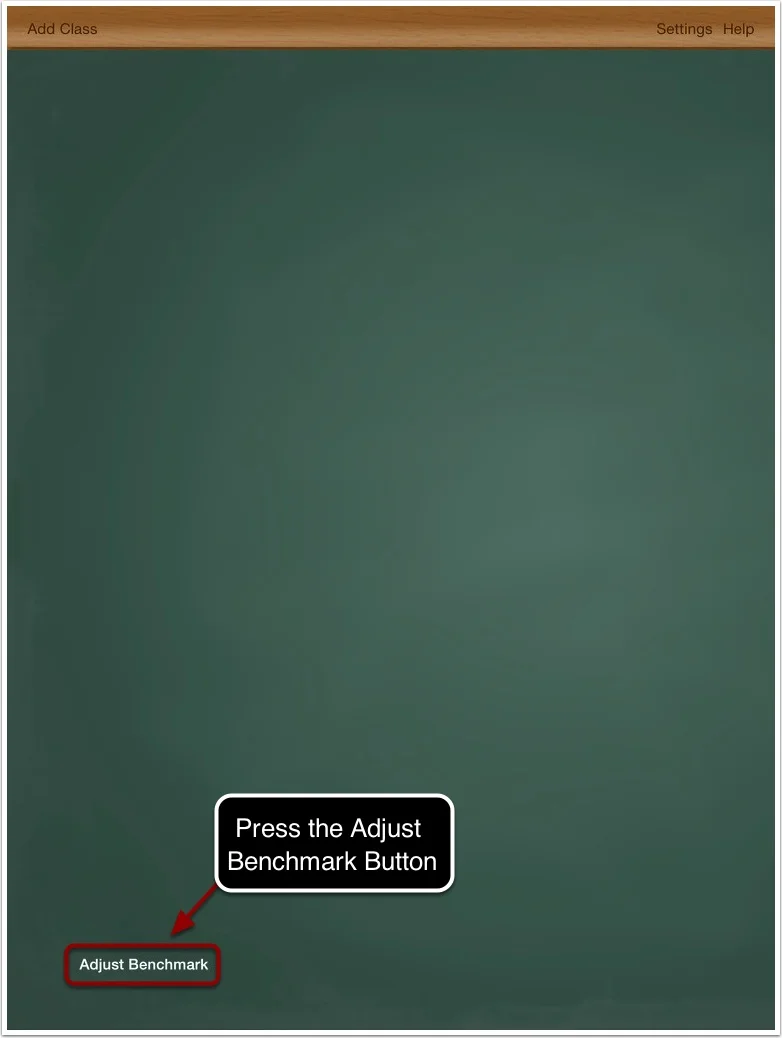
1. Press the Adjust Benchmark Button.
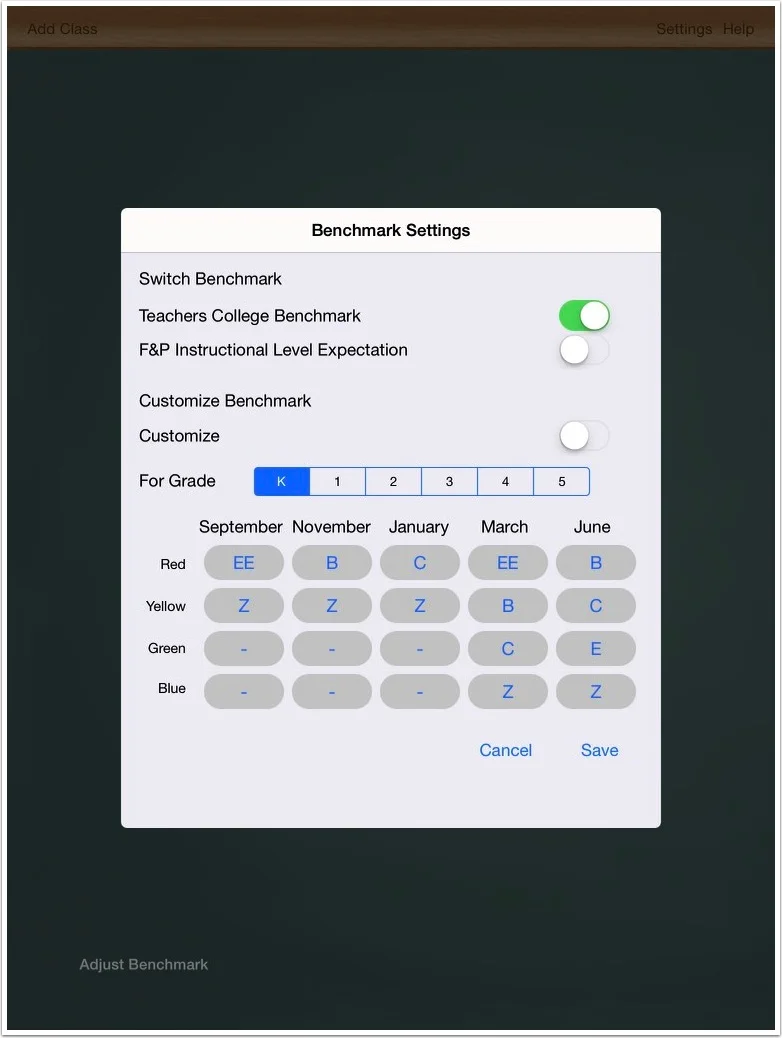
2. The default benchmark is set to Teachers College Independent Reading Levels. You can view the Teachers College benchmarks here.

3a. To change the benchmark to Fountas & Pinnell reading levels press the F&P Instructional Level Expectation slider to the on position.
3b. Press the save button to save the change.
* You can view the Fountas & Pinnell benchmarks here. Please note that the Fountas & Pinnell benchmarks only record reading levels four times a year while Teachers College record reading levels five times a year. In order to incorporate both benchmarks within our framework, we made the November and January reading levels the same on the Fountas & Pinnell benchmarks.
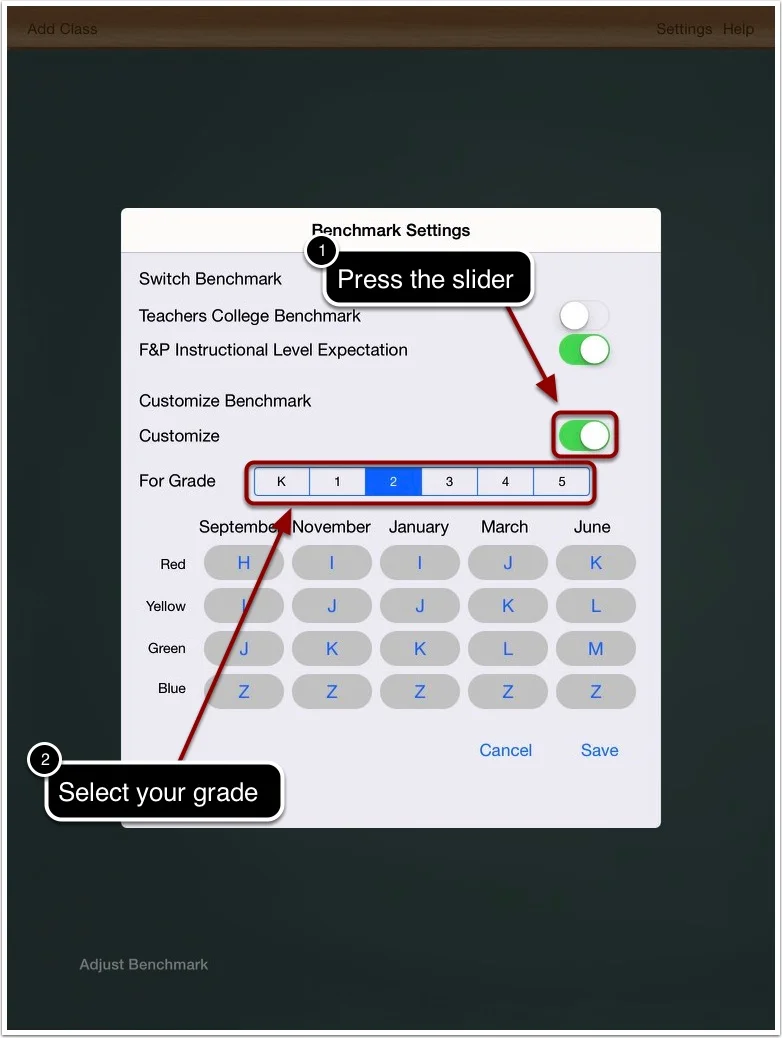
4a. To customize the reading level benchmarks completely, first press the Customize slider to the on position.
4b. Next, select the grade you wish to customize.
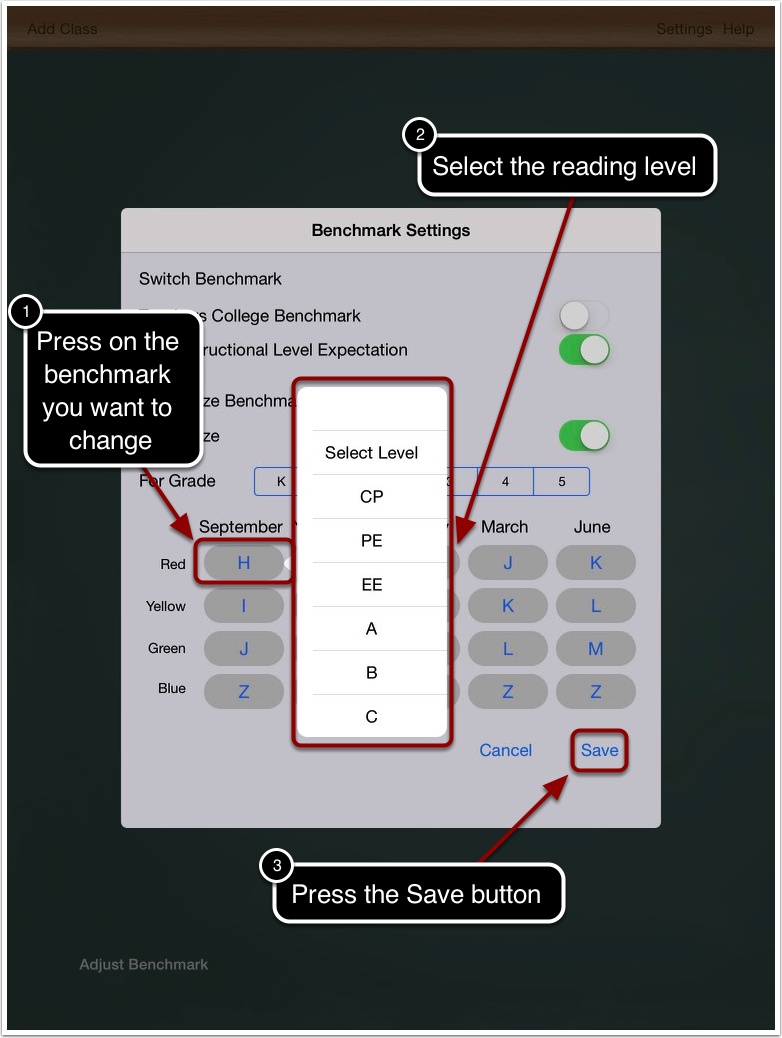
5a. Press on the benchmark you want to customize.
5b. Select the reading level.
5c. Press save to save your customizations.
Please note: Blue (Exceeds Standards) should always remain at level Z.